

Follow this tutorial if you have decided to use Windows 10 Mail
This will come pre-installed on any windows 10 machine and therefore no download will be needed.
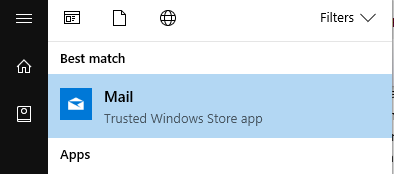
Open the app by clicking the start menu, search ‘mail’ then select Windows 10 Mail.
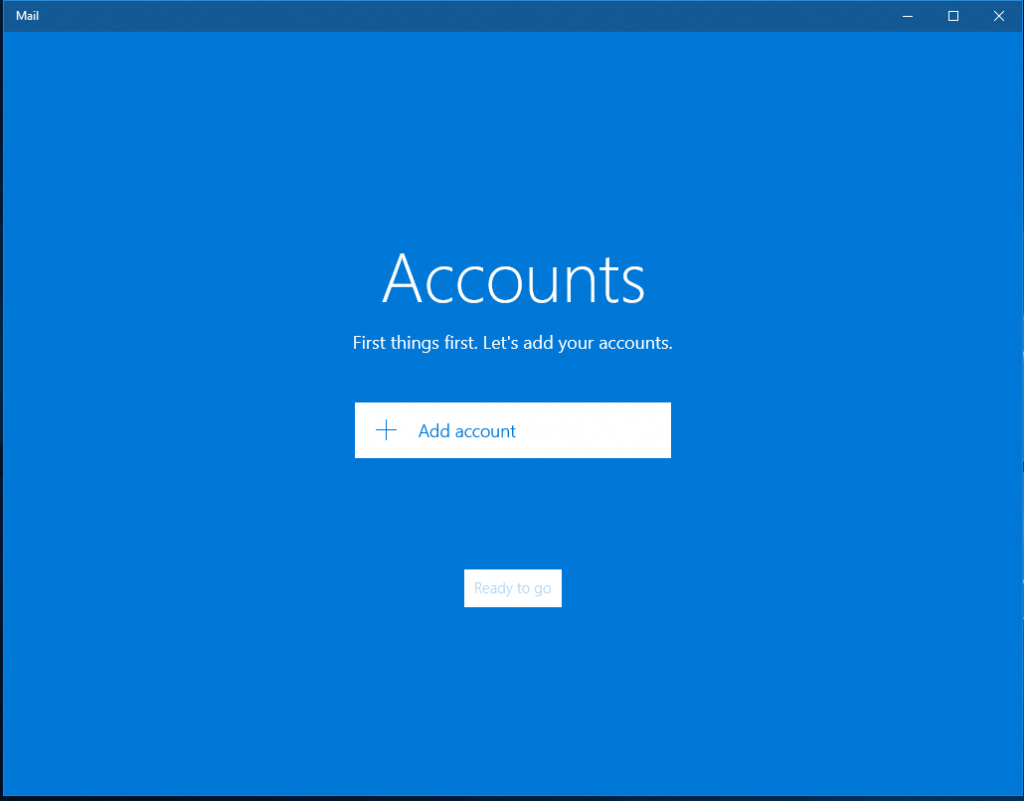
If you don’t have any accounts set up within Windows 10 Mail you should see this window: Click ‘Add account’.
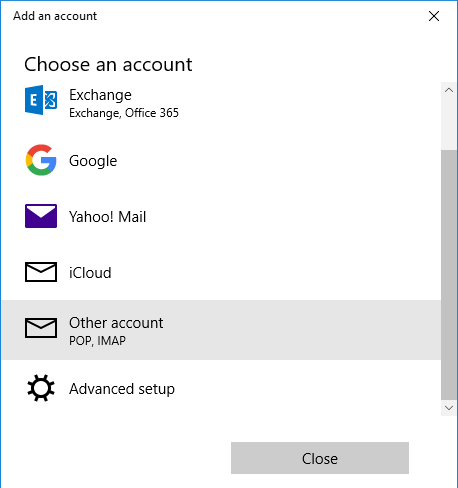
Scroll down this list and select ‘Advanced Options’ as shown below, then chose ‘Internet Mail.
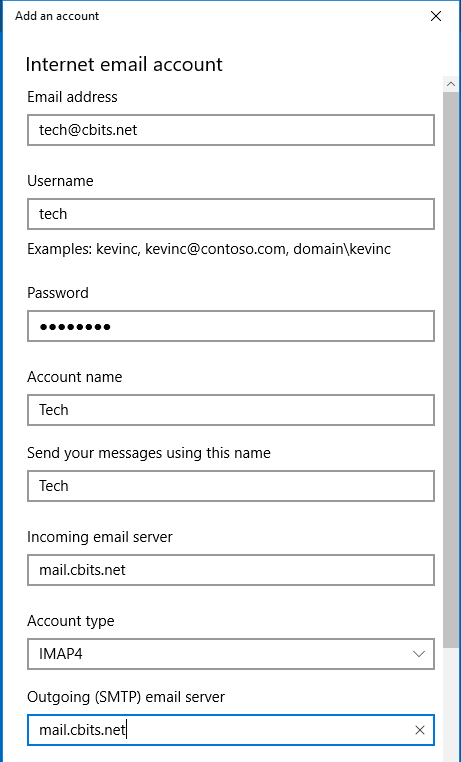
You will then be greeted with this new window…
If you wish to set up IMAP then follow then follow the next setup instruction, if you wish to set up POP3 then skip to the POP3 setup section.
IMAP Settings:
Email address: Enter your email address here [tech@cbits.net]
Username: Enter your email address [tech@cbits.net]
Password: Your email password here. This is case sensitive
Account name: Whatever you wish to name your account [Work]
Send your messages using this name: A familiar name so recipients will know who the email has come from e.g [ComputerBits Support]
Incoming email server: mail.yourdomain (e.g. mail.bestcompany.co.uk)
Account type: IMAP4
Outgoing (SMTP) email server: Same as Incoming mail server.
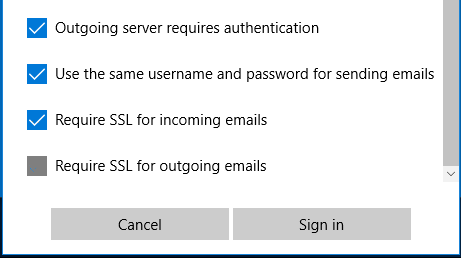
Once all that is entered you will see four tick boxes at the bottom as seen in the picture below…

Outgoing requires authentication: Ticked
Use the same username and password for sending emails: Ticked
Require SSL for incoming emails: Ticked
Require SSL for outgoing emails: Not Ticked
POP3 Settings:
For POP3 follow the same steps for IMAP until you get to the window where you enter your details. At this point you will have to enter this information instead:
Email address: Enter your email address here [tech@cbits.net]
Username: Enter your email address [tech@cbits.net]
Password: Your email password here. This is case sensitive
Account name: Whatever you wish to name your account [Work]
Send your messages using this name: A familiar name so recipients will know who the email has come from [ComputerBits Support]
Incoming email server: mail.yourdomain (e.g. bestcompany.co.uk)
Account type: POP3
Outgoing (SMTP) email server: Same as Incoming mail server.
Once all that is entered you will see four ticket boxes at the bottom as seen in the picture below…
Outgoing requires authentication: Ticked
Use the same username and password for sending emails: Ticked
Require SSL for incoming emails: Ticked
Require SSL for outgoing emails: Not Ticked