Firstly, log in to CbitsMail. If you don’t know how to do this, take a look at our tutorial.
I’m signed in, what now?
Once signed in, you will be presented with the screen below.
Move your mouse cursor to the left side of the screen and left-click Settings.
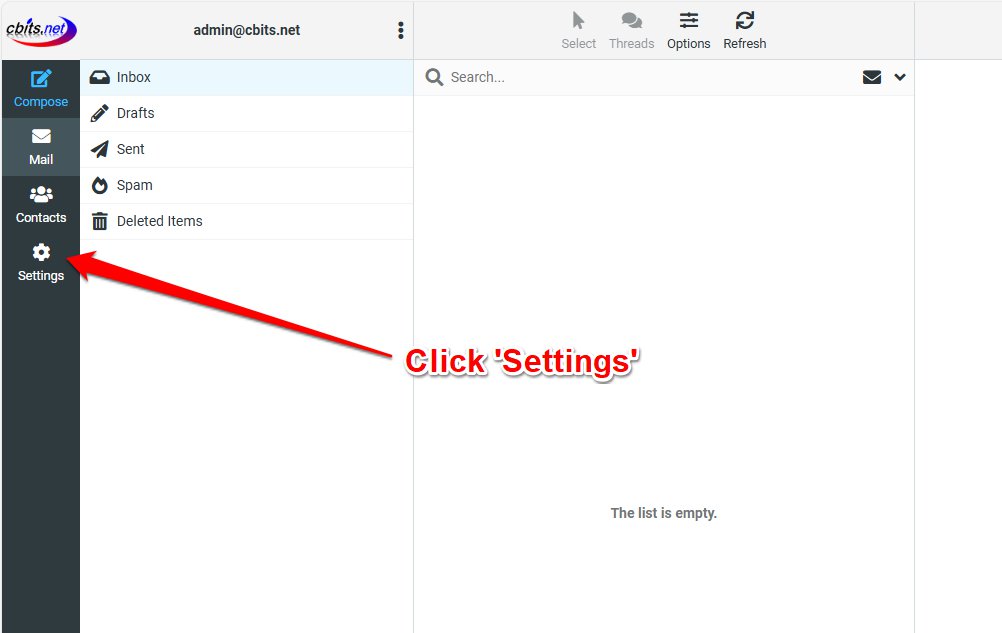
This will replace the list which previously showed Inbox, Drafts, etc. with a list of Settings we can adjust.
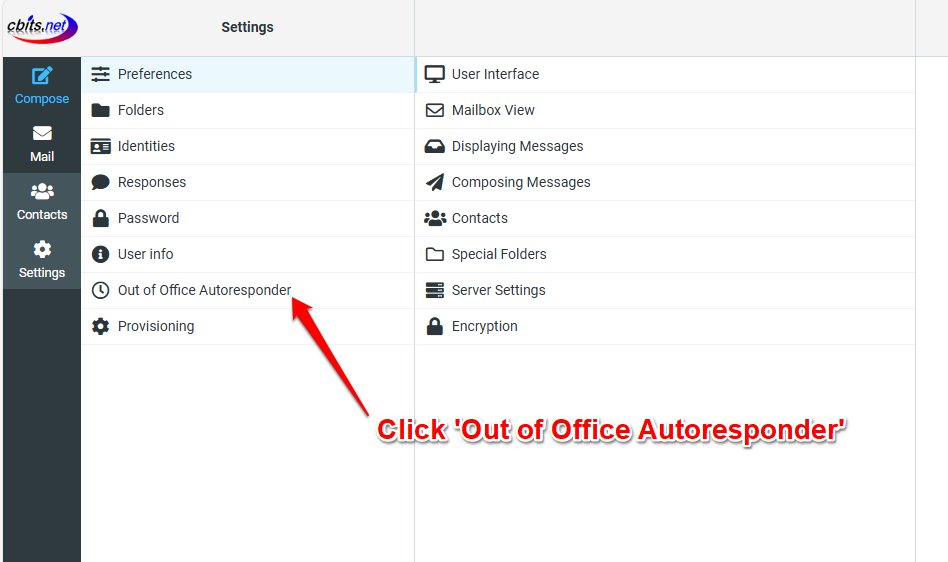
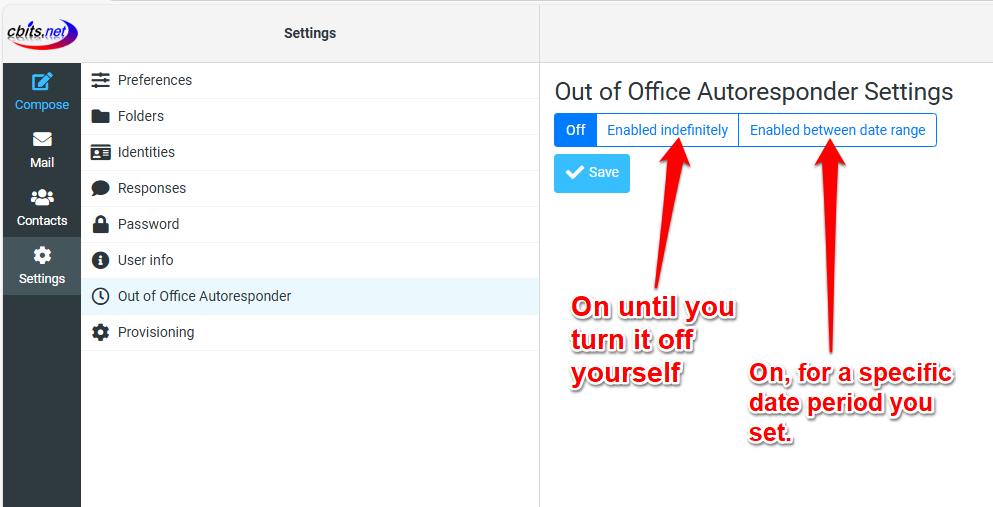
Towards the bottom of this list, select Out of Office Autoresponder as shown below.
With Out of Office Autoresponder selected, the right-hand-side will show buttons allowing you to toggle it on or off.
‘Enabled Indefinitely’ will keep the autoresponder on until you turn it off.
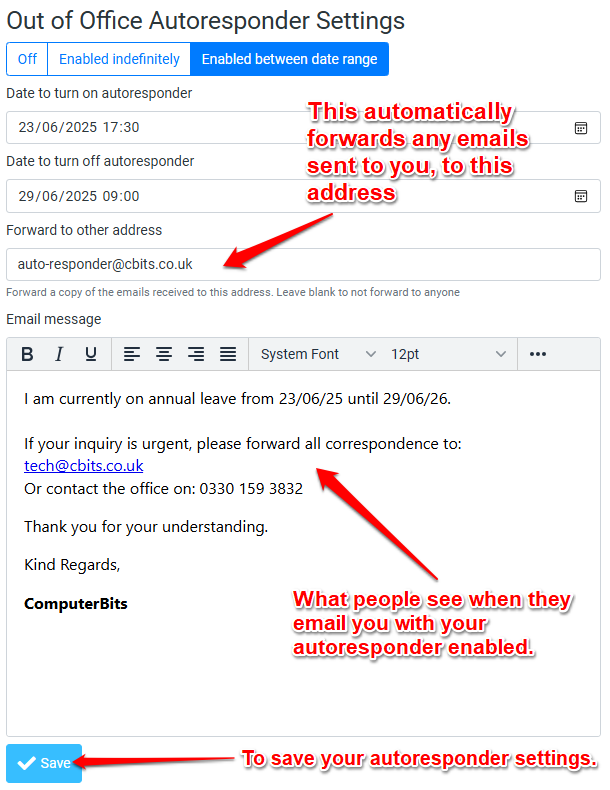
‘Enabled between date range’ allows you to specify the date and time the Autoresponder starts and when it ends.
Out of Office Enabled
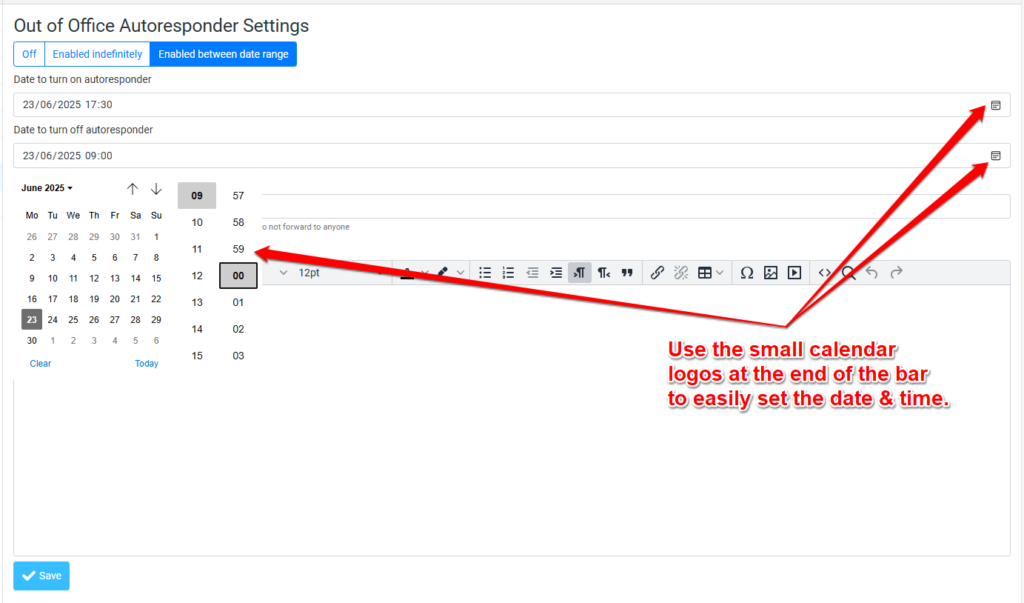
Once the autoresponder has been enabled more options will appear. In this circumstance, we are choosing the ‘Enabled between date range’ option as this is typically best practice.
Simply set the date/time you want your autoresponder to begin and then set the date/time you want it to end.
Use the little calendar buttons at the end of the date/time bars to more easily navigate between dates and times.
Enter the message that will be sent back to the original sender in the box below.
You can also set your emails to forward to a colleague while the autoresponder is enabled, allowing someone to receive and answer emails in your stead.
Press Save to save your settings, then press Mail on the left hand side to go back to your emails.